
Cloud Account & Access
A new main unit needs three things before anyone can use it: a network connection with internet, an owner's account on iNav4U cloud with the unit claimed to it, and a way for phones and laptops on board to open Zora. Do them in that order, once the main unit is installed (Main Unit V3 or Main Unit V2).
Connect Zora to the internet
Zora connects to the boat's router with a network cable, and the router gives it its address. The first update after the claim comes over this connection, so the router needs internet.
Starlink
The Starlink unit supplied with the dish is a power supply and a WiFi access point, with no network port. The optional Starlink Ethernet Adapter goes between the dish and that unit and adds one standard network port.
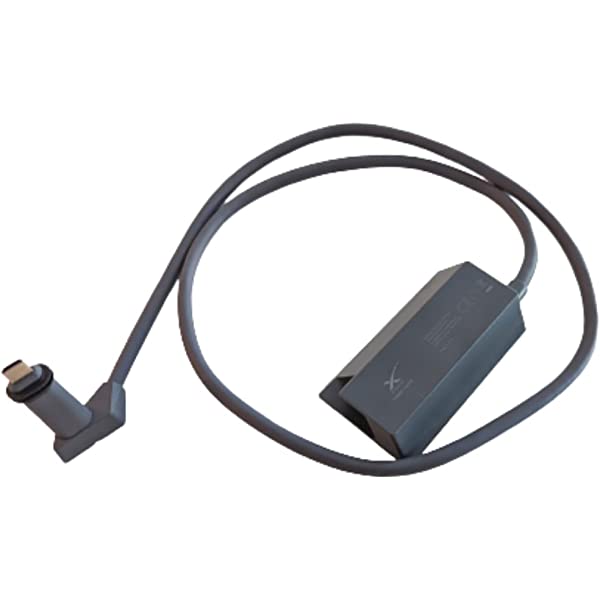
If Zora is the only wired device on board, plug it into the adapter with a CAT5 or CAT6 cable.
For more wired devices, now or later, plug a router's WAN port into the adapter and Zora into one of the router's ports. Any router brand works. A router that runs on 12 V saves running the inverter just to power the network.
Create a cloud account
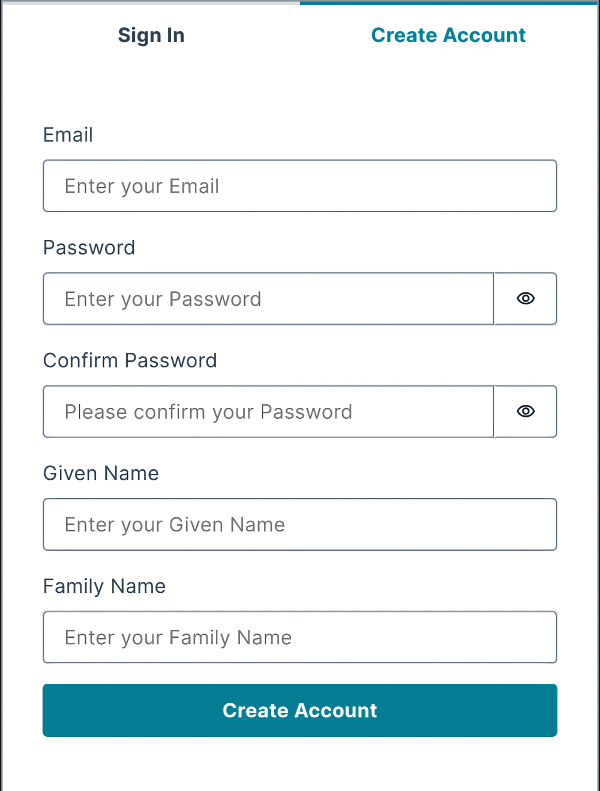
Open inav4u.cloud in a browser. It opens outside Zora and needs internet.
The site opens on Sign In. Switch to the Create Account tab.
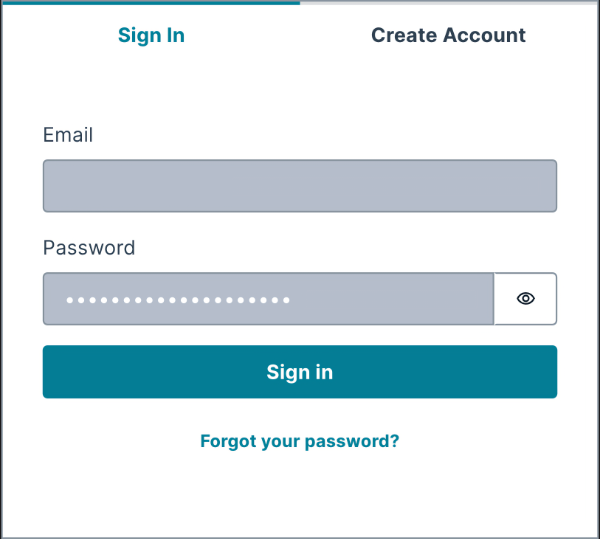
Fill in Email, Password, Confirm Password, Given Name and Family Name, and tap Create Account. The password needs at least 12 characters, with an upper case letter, a lower case letter, a digit and a symbol.
The cloud emails a code to confirm the address. Enter it to finish.
Claim the device
Claiming links the main unit to the owner's account. The main unit must be switched on and connected to the internet.
If you have the QR code from the documentation that came with the unit, scan it and sign in, or create the account. Claim Device opens with the MAC address already filled in. Tap Claim.
Otherwise, on Devices, tap Claim new device (on an account with no devices yet) or the round + at the bottom right. Enter the MAC Address printed under the QR code, in the form 00:00:00:00:00:00, and tap Claim.
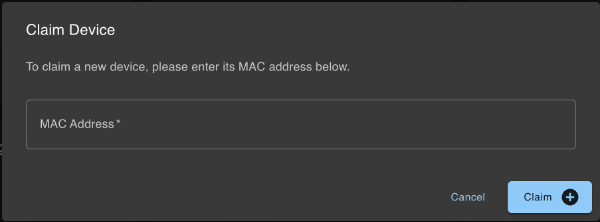
If Failed to claim device shows, check the MAC against the label. If the documentation is lost, contact iNav4U support (opens outside Zora, needs internet).
The first update
After Claim, the unit goes through four steps, shown as circles that turn green in turn: Authenticate, System Update, UI Update and Credential Renewal. This takes a few minutes.
Keep the unit powered
Do not switch the main unit off until all four steps are done. The dialog warns Do not turn off your device while updating, as this may cause errors.
While it runs, the dialog offers Add Aquamaps Account (see AquaMap charts). When it is done, it shows Zora is ready! and an Open Zora button.
Your devices in the cloud
Devices shows a card for each unit on the account: its name, MAC address, status and Last Update. The name ends in the unit's MAC address without the colons. An account can hold several units.
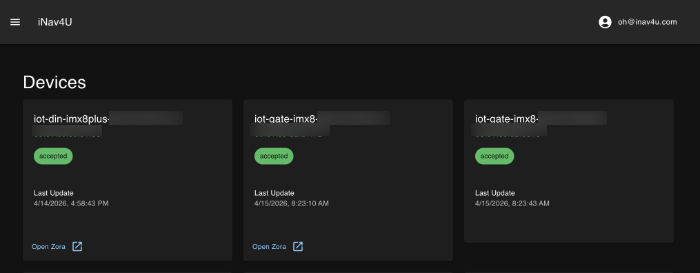
Tap a card to open the device.
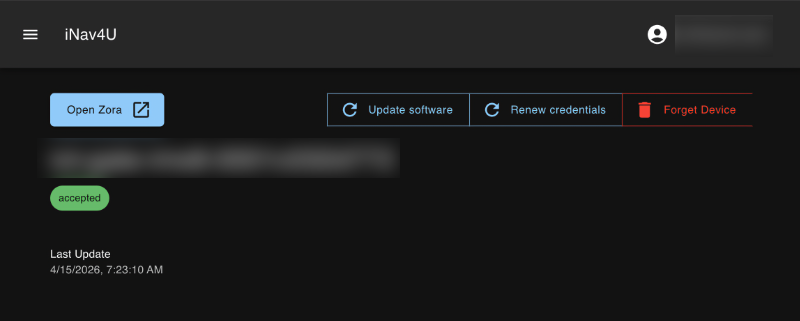
| Button | What it does |
|---|---|
| Open Zora | Opens Zora in a new tab, at the address the unit last reported. Missing if the unit has not reported one yet. See Reach Zora |
| Authenticate | Shown only while the unit is waiting to be accepted |
| Update software | Starts a software update |
| Renew credentials | Renews the unit's credentials with the cloud |
| Forget Device | Removes the unit from the account. Type its MAC address to unlock Forget. This cannot be undone |
The menu at the top left leads back to Devices. Tap your email at the top right for Settings and Sign out.

AquaMap charts
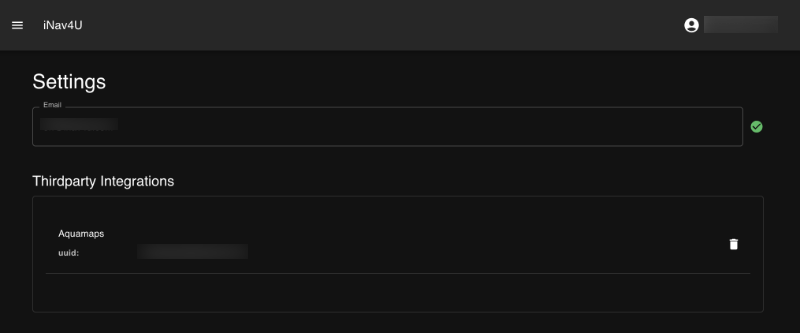
Settings shows your email and Thirdparty Integrations. Tap Add Aquamaps Account and enter the Username and Password of your AquaMap account. Your AquaMap charts then show in Zora's chart downloads under AQUA MAP. The bin icon beside the account removes it.
Reach Zora
Zora is a web page served by the main unit. Open it in a browser on a phone, tablet or laptop that is connected to the boat's own network. Mobile data or a marina's WiFi cannot reach it.
From the cloud, Open Zora on the device takes the browser to the address the unit last reported. It is a shortcut and only works on the boat's network, with the unit switched on. If the unit has been off, or the router has since given it another address, the browser shows an error such as "This site can't be reached".
On board, type zora.local in the address bar. Most networks pass the name on; some older routers do not.
If zora.local does not open, use Zora's address, for example http://192.168.1.95.
- Open the router's settings page, often http://192.168.1.1 or http://192.168.0.1. The password is often printed on the router.
- In the list of connected devices (called Connected Devices, DHCP Clients or similar), find the one whose name ends in Zora's MAC address without the colons. Note its address.
- Type that address in the browser, starting with http://.
Zora opens on Ensure safe navigation. Tap I agree, then log in.
Keep the address the same
The router can hand Zora a new address when it restarts, which breaks bookmarks and home screen icons. Reserve it:
- In the router's settings, find the DHCP reservation section (Address Reservation, Static DHCP or Reserved IP).
- Pick Zora from the device list and reserve its current address.
- Save.
The menus differ by router brand; the router's manual has the exact names. This video shows the same job for a printer, and Zora is reserved the same way.
To open Zora full screen on a phone or tablet, add it to the home screen once the address is fixed: Home Screen Icon.
Open the cloud account from Zora
- Tap the Zora logo at the left of the app bar and choose Settings....
- Under Cloud & Alerts, tap My Cloud Account.
- Tap Open Cloud Account. inav4u.cloud opens in a new tab.
On a fixed helm screen, Zora shows the address https://inav4u.cloud instead, to open on a phone or tablet.