

Main Unit V2
The Main Unit V2 is the aluminium-cased server that runs Zora, with its hard disk on a USB port. This page takes it from the box to a unit that is powered, on the boat's network and ready to be claimed. Connectors, the NMEA 2000 and NMEA 0183 wiring and the specifications are in the Main Unit V2 hardware reference.
Before you start
- Mount the unit out of direct sun, with room around it for cooling, and not close to a shortwave radio.
- The boat's router needs a working internet connection when you claim the unit. Claiming it is what makes iNav4U install Zora on it, and that install comes over the internet.
Connect the hard disk
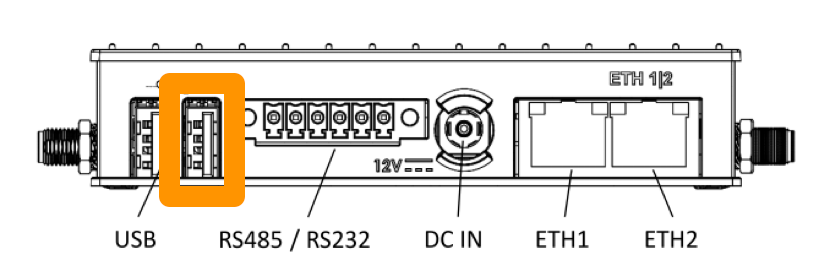
Plug the disk into the right-hand USB port on the rear panel. That is the only port Zora reads its data disk from.
The disk may be erased
On a boat that has not been set up yet, Zora formats a disk it cannot read. Use an empty disk, or one whose contents you do not need. Once the boat is set up, Zora never formats the disk.
Connect the router
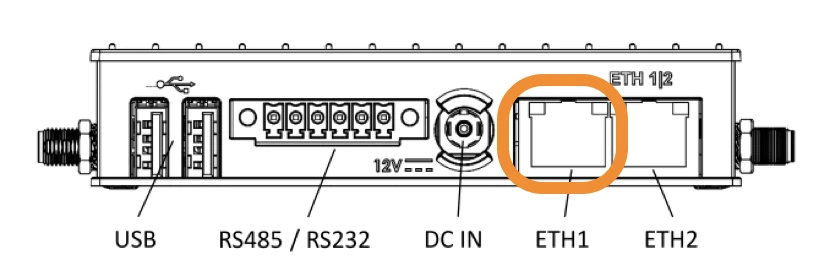
Run an Ethernet cable from the ETH1 port on the rear panel to a LAN port on the boat's router. ETH2 is the radar port; a network radar is wired there, as RayNet radar explains.
Connect power and switch on
- Connect an 8 to 36 V DC supply to the DC input. It does not need to be regulated. Fuse it at 1.6 A below 12 V, or 1 A at 12 V and above.
- Hold the power button until the yellow LED lights.
To switch off, press the button briefly and wait for the LED to go out. A long press forces it off. Avoid cutting the power while the unit is on.
Claim it and open Zora
- Create the owner's cloud account and claim the device. iNav4U then installs Zora on the unit over the boat's internet connection.
- Open Zora from a laptop or tablet on the boat's network.
- On a new boat, Zora opens the first-install assistant.
- Reserve the unit's address in the router, so it never changes: Keep the address the same.
If it does not work
| What you see | What to check |
|---|---|
| Zora shows No data volume | The disk is not reached. Check it is in the right-hand USB port on the rear panel. Then switch the unit off at the breaker, wait ten seconds and switch it back on |